

Invite someone
1
Find the invite form
On Overview, scroll down to Invite a staff member.
2
Enter their email and role
Type their Email and pick a Role. Use an email that doesn’t already have a shopper, muse or brand account on Outfiqe.
3
Send it
Choose Send invite. They get an email with a link to join. If they don’t have a team account yet, they set a name and password from that email first.
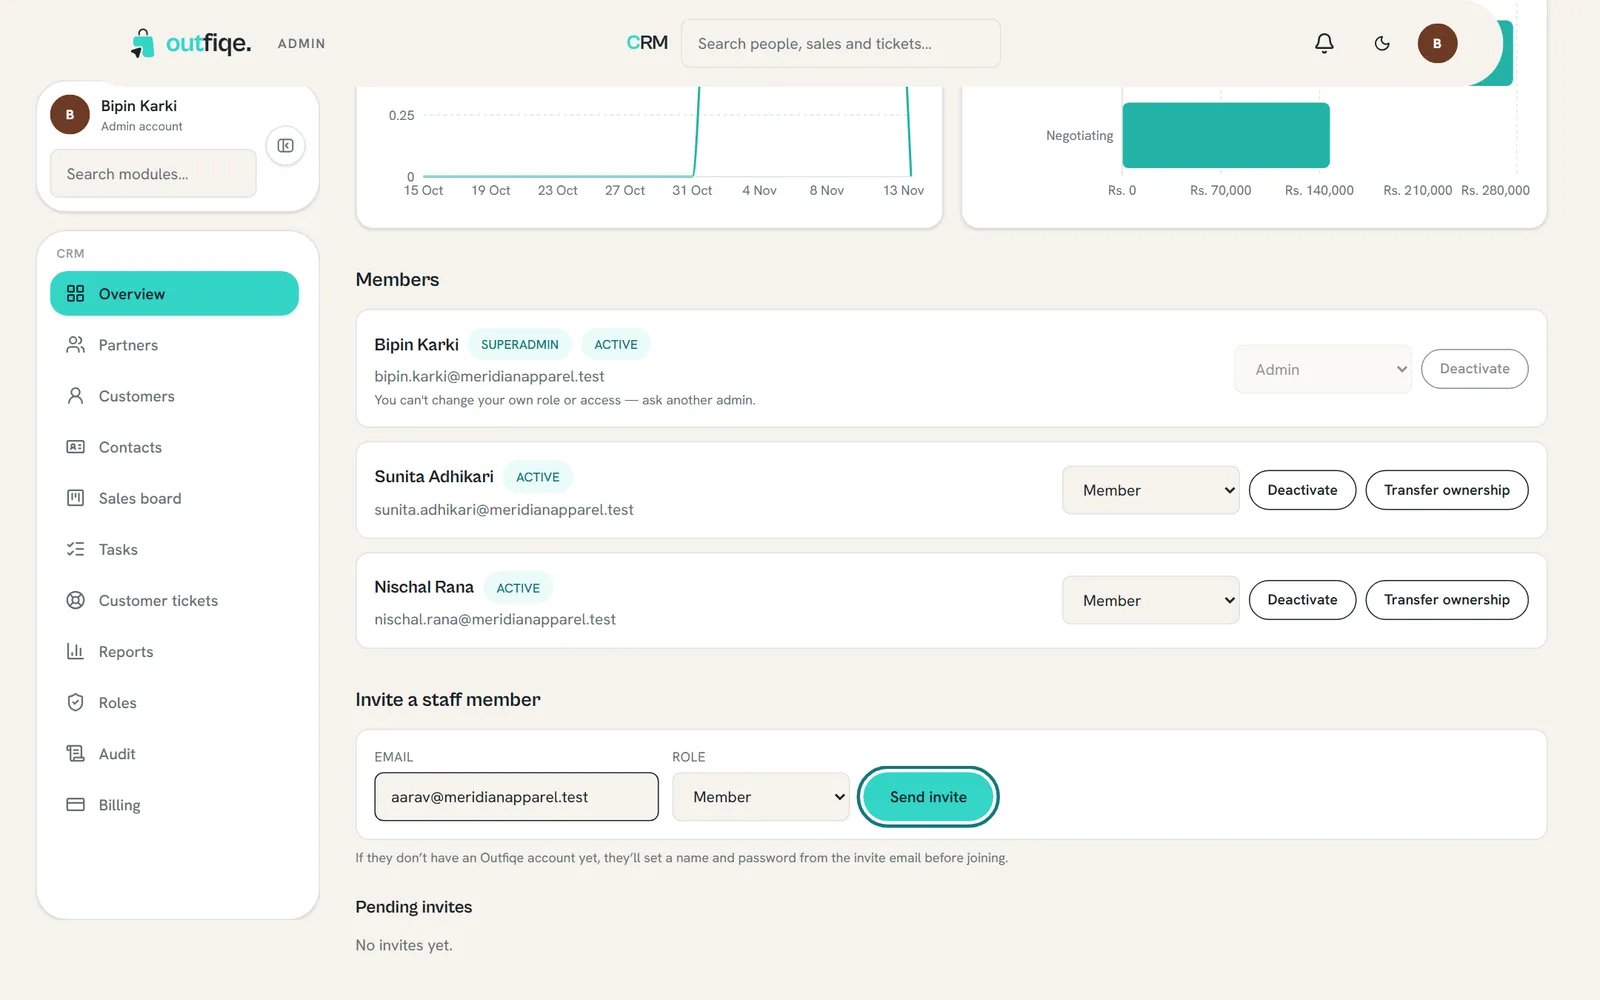
Pick the role before you send. You can change it later.
Manage your team
Everyone on the team is listed under Members on Overview, with their role and whether they’re active.- Change someone’s role with the menu next to their name.
- Deactivate someone who no longer needs access, the day they leave. They can’t sign in to your CRM after that.
- Transfer ownership to hand the CRM over to someone else. They’re asked to accept it before anything changes.
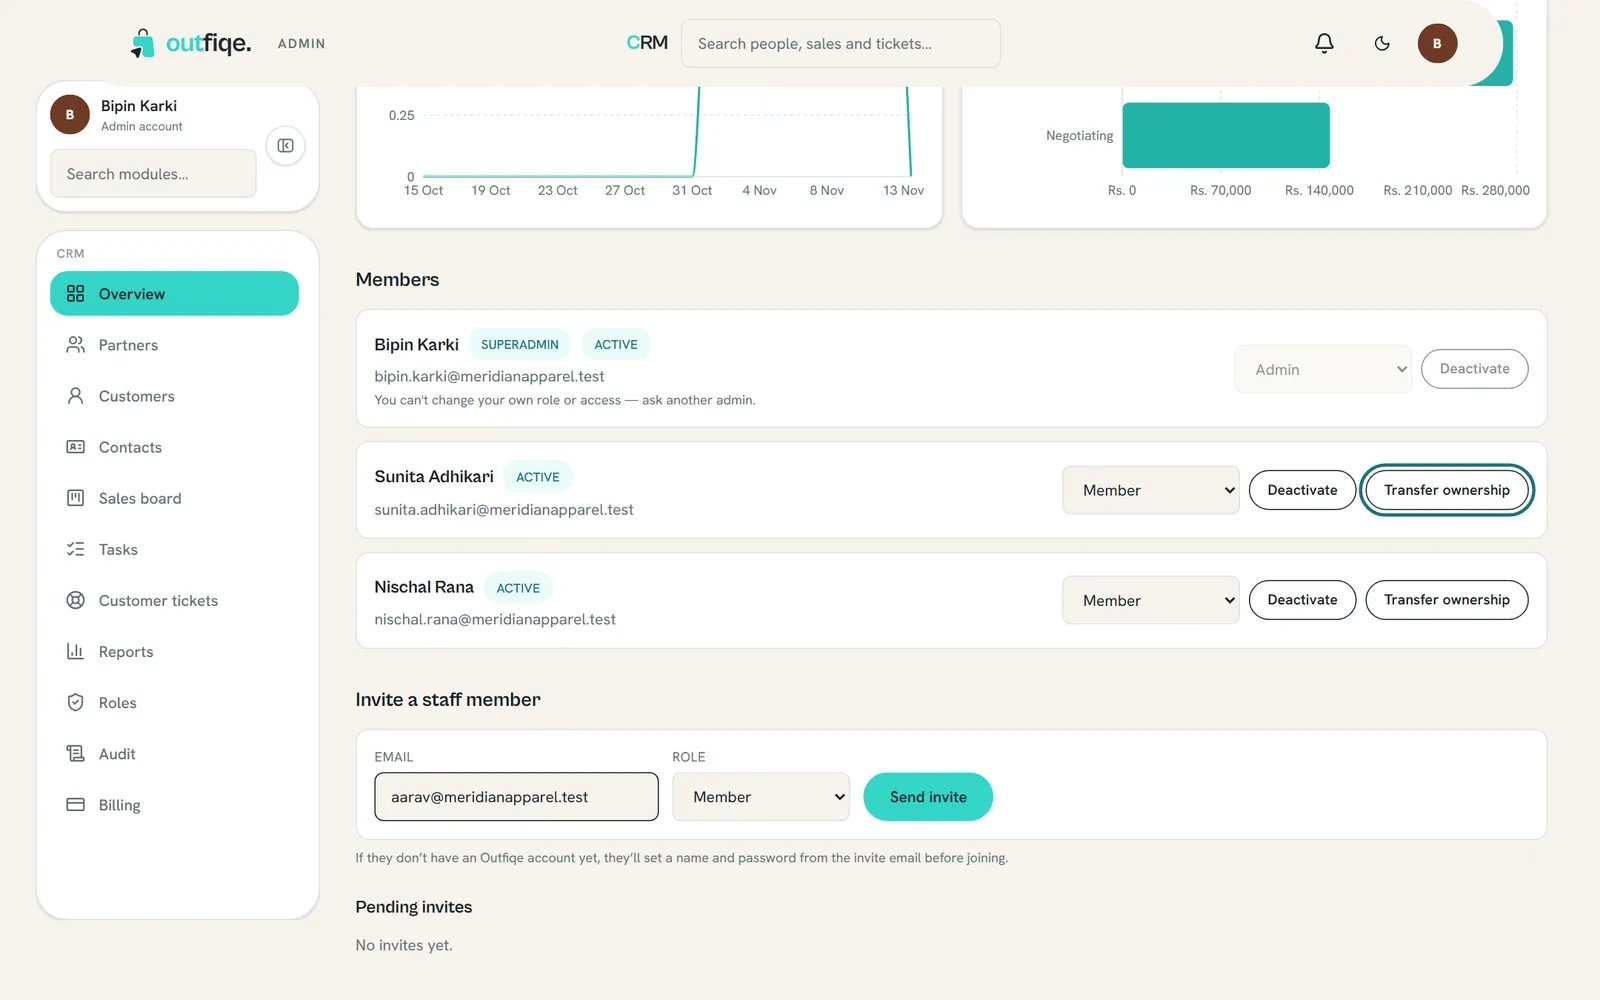
Each person's role, and the actions you can take for them.
Every person on your team uses a seat on your plan, so deactivating people you don’t need also keeps your bill down. See plan and billing.
Roles
Open Roles to see your roles. Two are built in:
You can rename your organization at the top of this page, under Organization name. Choose Save when you’re done.
Build your own role
If neither built-in role fits, make your own. For example, a “Support” role that can work on tickets but can’t see sales.1
Start a new role
On Roles, choose New role.
2
Name it and choose what it can do
Type a Role name, then tick each thing the role is allowed to do. They’re grouped by area, like activities, tasks and reports, or billing.
3
Save it
Choose Create role. It now shows in the Role menu when you invite or manage someone. To change it later, open it, edit, and choose Save role.
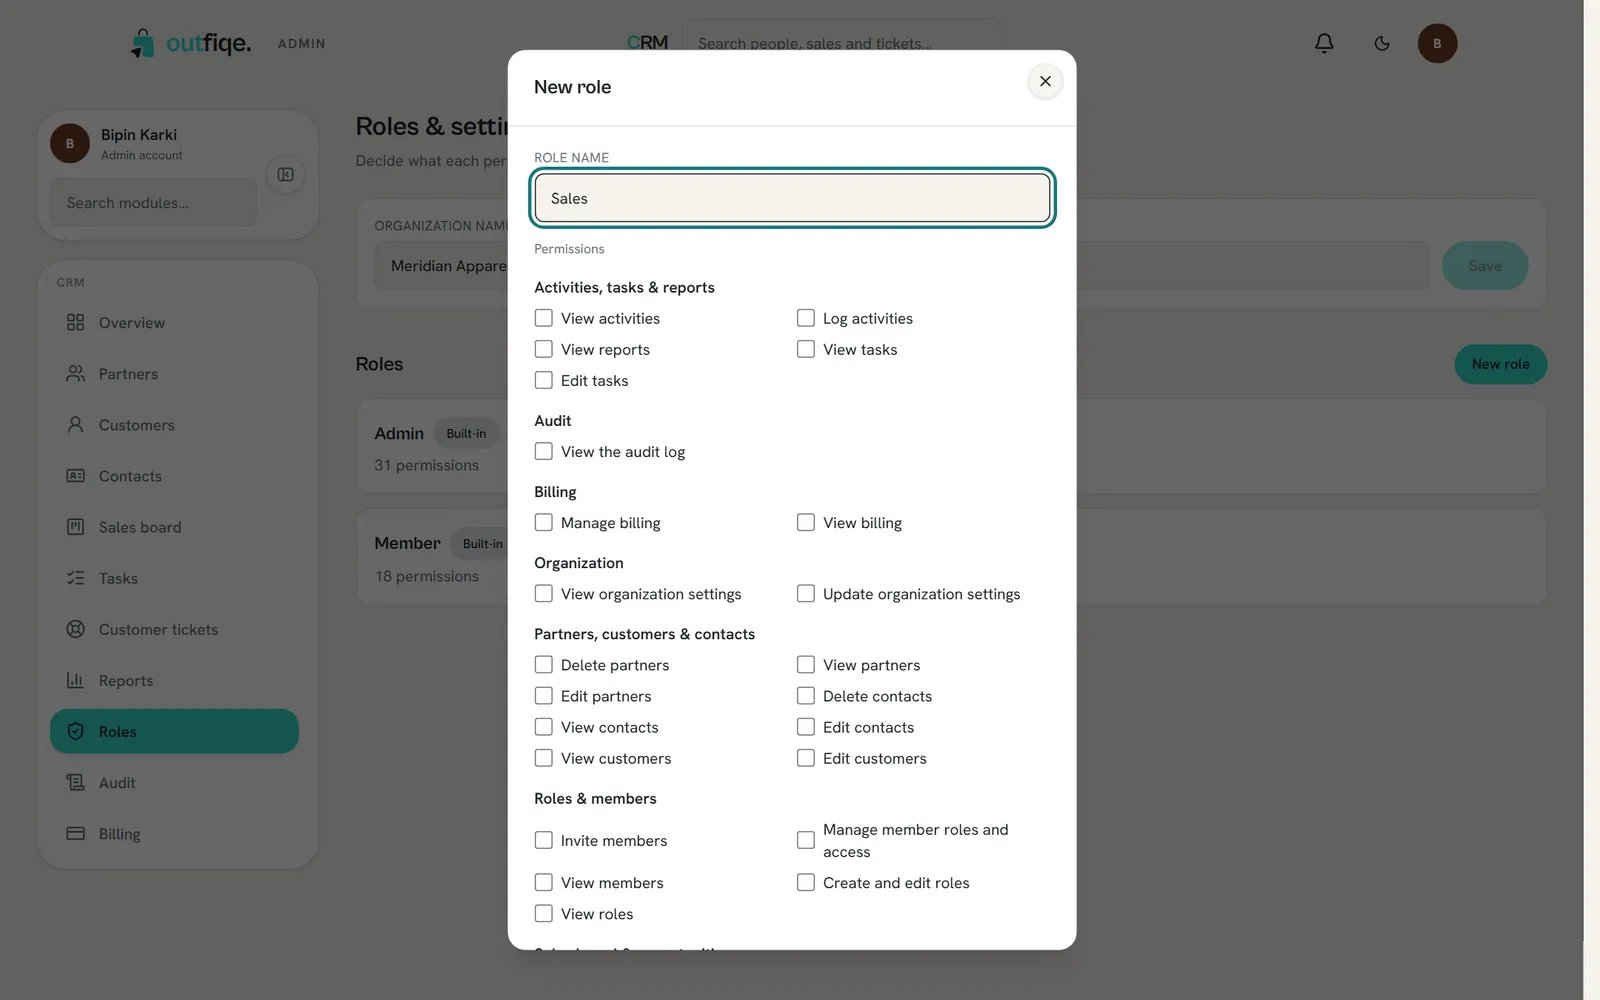
Give the role a name that says who it's for.
The audit log
Audit keeps a record of important changes: team members joining or leaving, role changes, ownership, billing and your organization’s details. Nobody can edit it, so you can always check who did what.- Use the tabs, Everything, Team, Roles, Billing and Organization, to narrow it down.
- Search by What happened or Who did it, or pick a date range.
- Choose Export CSV to download it as a spreadsheet.
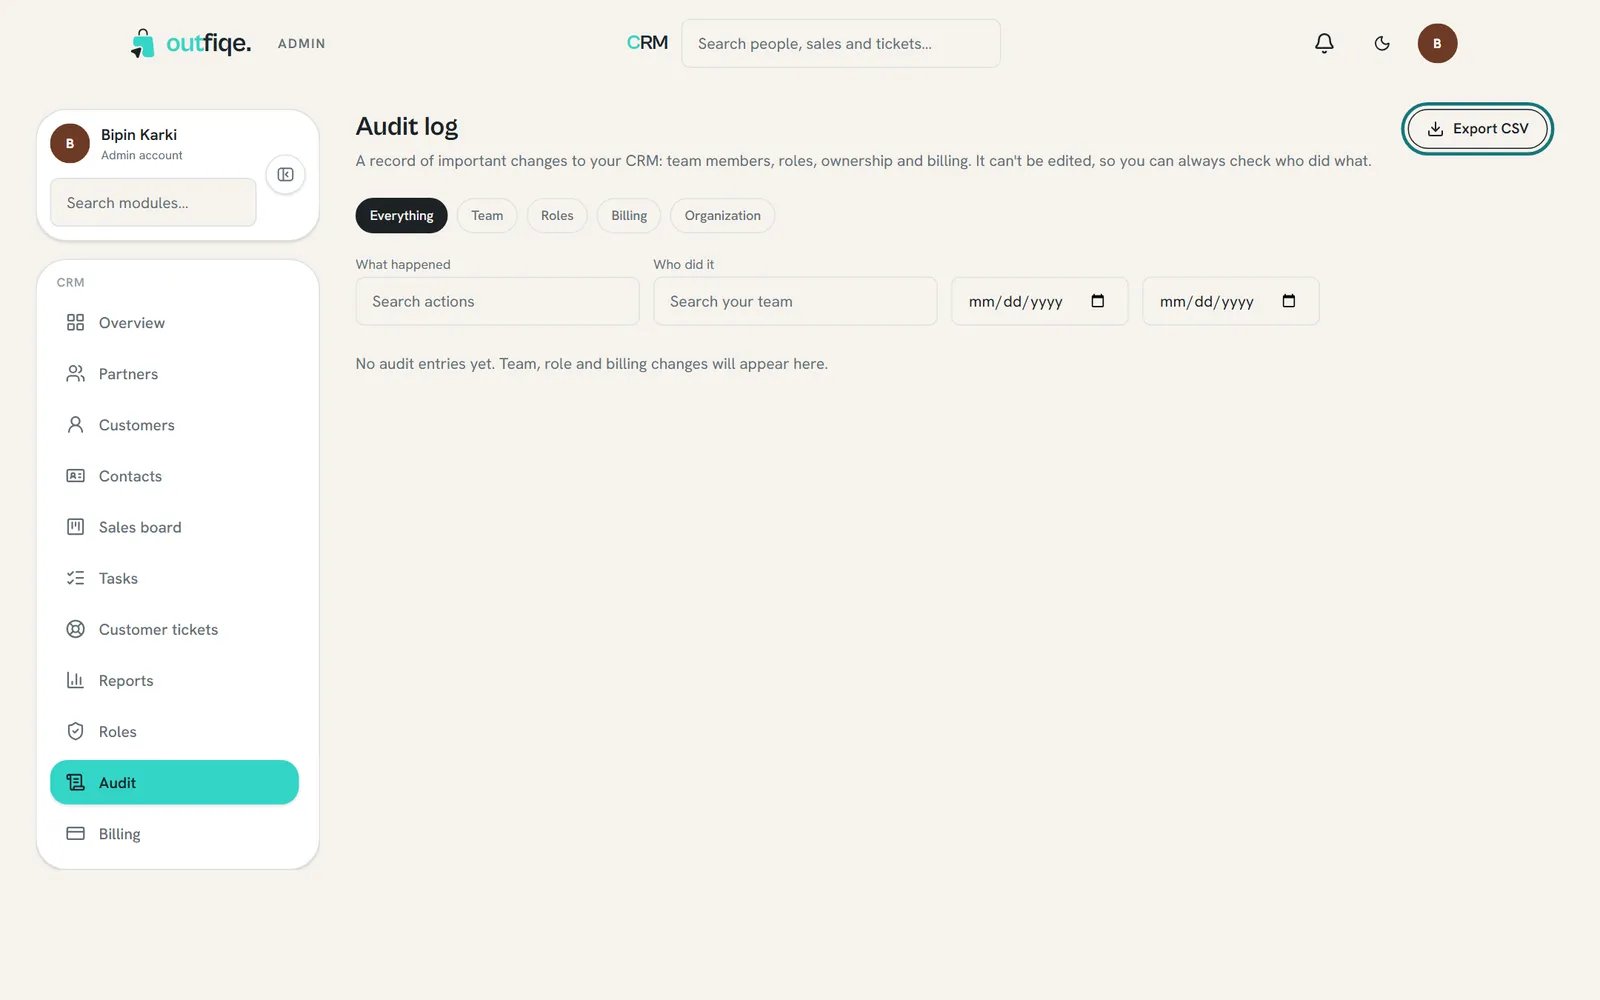
Nobody can edit the audit log, so it's a trustworthy record.